Category: Preparation

everything before launching

  • 2.4: Budgeting for Beginners: How Much Should You Really Start With?

    2.4: Budgeting for Beginners: How Much Should You Really Start With?

    Alright, we’ve arrived at the big money question. You’ve got your targets, tracking’s ready, the landing page is polished. Now, how much cash do you actually need to commit to get started with paid ads?

    You’ve probably heard advice like “start small, you can begin with just $10 a day!” or maybe you read back in Article 1.1 where I acknowledged starting with €200 is technically possible. Let’s get brutally honest about that now.

    The Hard Truth About Starting Too Small

    Yes, you can launch a campaign with a tiny budget. But should you? Based on my experience helping businesses scale with ads, starting with just a couple hundred euros is setting yourself up for a very difficult, high-pressure situation.

    Why? Because a budget that small gives you exactly one shot.

    Think back to our sneaker store example (Article 2.1 & 2.3). We calculated a target CPA of €47. If your total starting budget is only €200:

    • Best Case Scenario: If everything is perfect – your tracking, your landing page conversion rate (that assumed of 2% CR), your ad creative, your targeting – you might squeeze out 3, maybe 4 sales (€200 / €47 ≈ 4.25).

    • Profit? Barely. Those 4 sales at €100 AOV bring in €400 revenue. Your COGS/fees were €33 per order (€30 + €3), so €33 * 4 = €132. Your ad cost was €200. Total costs = €132 + €200 = €332. You made €400 – €332 = €68 profit. Great, right?

    • The Hidden Costs: But wait. That €68 profit doesn’t account for the time you spent setting everything up, writing copy, creating graphics, packing orders. What if just one of those customers requests a refund? Suddenly, your tiny profit margin evaporates, and you’re likely in the negative.

    • What If It Doesn’t Work? What happens if you spend that €200 and get zero sales? Or only one? You’re out of budget. You have no more chances to test different ads, different audiences, or fix the funnel issues you might have discovered. Game over before it really began.

    Starting too small forces you to be perfect on your first try, which rarely happens. It ignores the value of your time and the real-world risks like returns.

    My Recommendation: Aim for €2,000 for Your Initial Testing Phase

    This might sound like a lot compared to the “start with $5” advice, but hear me out. I recommend aiming for an initial testing budget of around €2,000.

    Why €2,000? It Buys You Runway and Data.

    This isn’t about guaranteeing profit. It’s about giving yourself a realistic chance to figure things out. A €2k budget allows you to:

    1. Run Meaningful Tests: You can test different ad approaches, audiences, or landing page variations without running out of money after a day or two.

    2. Gather Enough Data: You can spend enough to get statistically relevant feedback. Getting 0 sales from €50 spend tells you very little. Getting 5 sales from €500 spend starts to give you reliable CPA data. You need enough volume to see real patterns.

    3. Survive Imperfection: If your first test doesn’t hit the target CPA, you have budget left to analyze why (using the funnel metrics from 2.3), make adjustments, and try again. You get multiple shots, not just one.

    4. Evaluate Mid-Stream: After spending, say, €300-€500 of that €2k, you can pause and evaluate. Are things heading in the right direction (even if not profitable yet)? Or is it clear something is fundamentally wrong? A larger budget allows for these crucial check-ins.

    5. Be Ready to Scale (If It Works): What happens if your initial test is successful and hits your target CPA? If you only budgeted €200, you now have a winning formula but no fuel left in the tank. A €2k starting pot means if you find something that works early, you have the immediate funds to start scaling it up carefully.

    This €2,000 figure is a solid ballpark for serious testing, regardless of your specific target CPA. It’s about having enough budget to run ads long enough and broadly enough to learn effectively and get reliable answers based on data, not just hopeful guesses after spending pocket change.

    Getting your initial budget right, focused on learning and data gathering, is the final piece of the preparation puzzle. With your goals set, tracking in place, landing page checked, and a realistic test budget defined, you’ve laid the essential groundwork.

    Now, you’re actually ready to step into the ad platform. In Section 3, we’ll dive into Launching Your First Campaign, focusing initially on Facebook Ads for simplicity. Let’s get those ads live!


  • 2.3: Is Your Website (Landing Page) Ready to Catch the Fish?

    2.3: Is Your Website (Landing Page) Ready to Catch the Fish?

    So, you’ve set your targets (2.1) and your tracking is verifying results (2.2). Great. Now, where are you actually sending people who click your ads? And more importantly, is that page ready to turn that expensive click into a customer?

    Think about it: effective paid media often boils down to two main parts:
    a) Getting the right customer to your website via the ad.
    b) Your website doing the rest – converting that visitor.

    Too many businesses focus only on the ads and forget that a leaky landing page sinks the whole ship. You can have the best ad in the world, but if it sends people to a confusing, slow, or untrustworthy page, you’ve just wasted your money.

    Where to Send Ad Traffic? The Path of Least Resistance

    Imagine you’re scrolling through Instagram Reels or TikTok. You see an ad for a pair of seriously cool sneakers, you tap it instinctively. What happens next is crucial.

    • Bad Scenario: The link dumps you on the brand’s homepage. Now you have to do the work – figure out where the shoes are, navigate menus, maybe search… Forget it. You’re probably back to scrolling within seconds. Your buying intent, which was high for that specific shoe, just evaporated due to friction.

    • Good Scenario: The link takes you directly to the product page for those exact sneakers shown in the ad. You see clear images, the price, description, and a big ‘Add to Cart’ button. Simple, direct, relevant.

    Rule #1: Send paid traffic to the most relevant page possible. For product ads, this is almost always the specific product page. Minimize the steps and thinking required for the visitor. They saw cool shoes, take them straight to the cool shoes.

    First Impressions: Match the Message & Be Clear Instantly

    Remember, the visitor likely forgot the exact ad creative the second they clicked. Your landing page needs to immediately reassure them they’re in the right place and reiterate the core value proposition.

    • Headline & Visuals: Does the main headline and hero image/video clearly match what the ad promised? If the ad showed green shoes, the page must prominently feature green shoes. Any disconnect creates confusion and kills trust instantly.

    • Clarity: Is it immediately obvious what the product is, who it’s for, and what the main benefit is? Don’t make people hunt for information. Here’s a simple test: Imagine your dad, maybe someone around 60 who isn’t glued to technology 24/7, landing on this page. Would he instantly understand what you’re selling? Would he know exactly where to click to buy it? Or would he get lost in confusing jargon, distracting pop-ups, or unclear navigation? If your page wouldn’t pass the ‘dad test,’ it’s likely too complicated for many potential customers coming from a quick ad click. Keep it simple and direct.

    Common Conversion Killers You MUST Check

    These might seem basic, but they sink campaigns daily:

    1. Load Speed: If your page takes more than a few seconds to load, a huge chunk of visitors will leave before it even appears. This is especially true on mobile.

      • Action: Test your page speed using tools like Google PageSpeed Insights. Optimize images, use good hosting, and fix technical issues slowing it down. Test speed from the perspective of the countries you’re targeting.

    2. Mobile Experience: Is your page easy to view and use on a phone? Pinching and zooming to read text or hit tiny buttons? Forget about conversions. It must be fully responsive and mobile-friendly.

    3. Payment Options: Especially crucial if selling internationally. Do you offer the payment methods common in your target market? (Example: Greece often uses Pay on Delivery). Are modern, easy options like Apple Pay / Google Pay available and working? Broken or missing payment options are conversion killers at the final step.

    The Call-to-Action (CTA): Make it Obvious

    What do you want the visitor to do? Buy now? Add to cart? Sign up?

    • Your primary CTA button should be prominent, clear, and action-oriented (e.g., “Add to Cart,” “Buy Now,” “Get Your Quote”). Think back to the ‘dad test’ – would the button be immediately obvious to him? Is the text clear about what happens when clicked?

    • Don’t hide it below the fold or make it blend into the background.

    • Avoid multiple competing CTAs that confuse the visitor. Focus on the main conversion goal for that page.

    Build Trust – Fast

    People buying from an ad often don’t know your brand. You need to build credibility quickly:

    • Social Proof: Customer reviews, ratings, testimonials.

    • Security: Visible trust badges (SSL certificate lock, secure payment logos).

    • Clarity: Clear shipping & return policy information easily accessible.

    • Contact Info: Makes you look like a real, reachable business.

    Using Your Funnel Metrics to Diagnose Landing Page Issues

    Remember those target costs we estimated in Article 2.1 (CPLPV, ATC Cost, IC Cost)? Now they become your diagnostic tools for the landing page:

    • High Cost per Landing Page View (CPLPV)? Could be ad relevance, or your page is loading too slow, causing people to bounce before the Pixel even fires properly. Check page speed first!

    • Good CPLPV, but High Cost per Add to Cart (ATC Cost)? People are landing, but not taking the first step. Ask why:

      • Misleading Info? Does the page fail to deliver on the ad’s promise? (Wrong product, different price/offer).

      • Low Quality Perception? Do the page design, images, or copy make the product seem cheap or untrustworthy?

      • Not Educated Enough? Is the product description unclear? Benefits not highlighted? Key questions unanswered?

      • No Trust? Missing reviews, security seals, clear policies?

      • Simply Not Needed/Wanted? Maybe the offer itself isn’t compelling to this audience (we’ll refine audience/offer later, but the page must present it well).

    • Good ATC Cost, but High Cost per Initiate Checkout (IC Cost)? They add to cart but don’t proceed. Often issues after the product page:

      • Shipping Cost Shock? Are shipping costs revealed too late and are they too high?

      • Confusing Cart Page? Is it hard to navigate or update the cart?

    • Good IC Cost, but High Cost per Purchase (CPA)? They start checkout but don’t finish. This points to checkout process problems:

      • Payment Issues? Missing options (Apple Pay, Google Pay, local methods)? Payment gateway errors? Security concerns?

      • Forced Account Creation? Guest checkout is often preferred.

      • Form Too Long/Complex?

    Your Quick Landing Page Pre-Flight Checklist:

    Before sending paid traffic, quickly sanity-check your destination page:

    1. Relevance: Does it directly match the ad message/product?

    2. Speed: Does it load quickly (check PageSpeed Insights)?

    3. Mobile: Is it flawless on a smartphone?

    4. Clarity: Is the offer/product instantly understandable? Headline clear? Passes the ‘dad test’?

    5. CTA: Is the main Call-to-Action obvious and compelling?

    6. Trust: Are basic trust signals present (reviews, security, policies)?

    7. Functionality: Do all buttons work? Does the checkout process flow smoothly (test it!)?

    Don’t Underestimate Your Website’s Role

    Your landing page isn’t just a passive receptacle for traffic; it’s an active part of your sales machine. Optimizing it based on data and best practices is just as important as creating good ads. Get the page right, and you give your ad spend a much better chance of delivering profitable results.

    Next Up: Fueling the Engine

    Okay, your targets are set, tracking is ready, and your landing page is polished. Now for the final preparation step: deciding how much fuel (money!) to put in the engine for your first test drive. Let’s talk budgeting in Article 2.4.

  • 2.2: Tracking Setup: The Boring Bit That Saves Your Money

    2.2: Tracking Setup: The Boring Bit That Saves Your Money

    Alright, you’ve done the crucial homework from Article 2.1. You know your target CPA, your target ROAS, and the basic math of your business. Excellent.

    Now, how do we actually tell platforms like Facebook (Meta), TikTok, Snapchat, etc., what we’re aiming for and measure if we’re hitting it? That brings us to tracking setup – specifically, installing tracking pixels.

    Honestly? Many people find this part tedious. I get it. You want to create cool ads and see sales roll in, not spend time on technical setup. But let me be blunt: getting your tracking right is non-negotiable. Neglecting this step is basically setting your money on fire.

    Why Tracking Isn’t Optional: Teaching the Algorithm

    Think of the advertising algorithms (Meta, TikTok, etc.) like powerful but initially clueless assistants. They know their own metrics really well – reach, impressions, clicks, likes, video views. But they have no idea what a ‘Purchase’ means to your business, or how much that purchase is worth, or who is most likely to make one on your specific website.

    Your tracking setup is how you teach the algorithm.

    You’re telling it: “Hey, this action – someone completing a purchase on my site – is what I value most. Go find me more people likely to do this.”

    If your tracking sucks, or is non-existent? You’re giving the algorithm bad instructions, or no instructions at all. It will still spend your money, but it will likely optimize for the easiest, cheapest actions – often clicks from people who browse but never buy (maybe kids clicking shiny things or grannies liking everything they see). For our sneaker store example, that’s not the audience we want, right?

    Bad tracking = mis-optimised ads = wasted money. It’s that simple.

    What Exactly is a Tracking Pixel?

    In simple terms, a tracking pixel (like the Meta Pixel, TikTok Pixel, or Snap Pixel) is a small piece of code you install on your website. Its job is to:

    1. Track Visitors: It notes when someone who saw or clicked your ad lands on your website.

    2. Track Actions: It records the specific actions those visitors take (like viewing a product, adding to cart, buying).

    3. Send Data Back: It reports this information back to your corresponding ad platform’s Ads Manager.

    This allows you to see which ads are leading to valuable actions, and it feeds data to the algorithm so it can learn who your best customers are and find more people like them.

    How to Set It Up? (Hint: Use the Official Guides)

    Look, all the platforms want you to advertise successfully (so you keep spending money!). They provide extensive documentation on how to set up tracking.

    These guides cover the steps for various website platforms (Shopify, WooCommerce, etc.) and manual installation.

    I’m not going to walk you through the clicks here. Why? Because learning to use these resources and solve basic setup issues yourself is part of the process. My passion is data and optimization, not basic account setup. You need to handle these foundational steps to get to the good stuff.

    Which Events MUST You Track?

    Okay, once the Pixel base code is installed, you need to tell it which specific actions (events) to track. Think about the customer journey for our sneaker store:

    1. ViewContent: Someone views a specific product page. (Tells you which products are getting attention).

    2. AddToCart: Someone adds a product to their shopping cart. (Shows intent, but they haven’t committed yet).

    3. InitiateCheckout: Someone starts the checkout process. (Stronger intent, closer to buying).

    4. Purchase: Someone completes the purchase. (The ultimate goal!). This should ideally include the purchase value.

    • Optional but Recommended: Lead/Subscribe: If you collect emails (e.g., for a newsletter or discount code), track this too. An email lead has value.

    Tracking these key funnel steps lets you see where people are dropping off (like we discussed with the funnel math in 2.1) and allows the ad platforms to optimize towards your most valuable actions (usually Purchase).

    The Reality Check: Tracking Isn’t Perfect (Thanks, iOS 14.5!)

    Now, a dose of reality. Since Apple’s iOS 14.5 update in 2020/2021, tracking has become harder. Users can now opt-out of tracking across apps and websites, meaning pixels might miss some data. Certain browsers (like Firefox) also have stricter tracking prevention.

    What does this mean for you?

    • Expect Discrepancies: Your Ads Manager (Meta, TikTok, etc.) might report slightly different numbers than your website’s backend (e.g., Shopify analytics). It’s common for ad platforms to under-report sales slightly. A general rule of thumb is if the platform is reporting around 70-80% of the sales your store sees, the tracking is likely working reasonably well for directional insights.

      • Example: Facebook shows 20 sales, but your store recorded 24 sales that could have come from ads. The CPA/ROAS in Ads Manager might look slightly worse than reality, but it’s still usable data. Just view it with a grain of salt.

    • Attribution Windows: Remember that platforms might attribute a sale even if someone clicked your ad days ago (e.g., 7-day click window).

    • Conversions API (CAPI) / Events API: To combat data loss, platforms introduced server-side tracking (like Meta’s CAPI or TikTok’s Events API). This allows your website’s server to send data directly to the platform, bypassing some browser limitations. Many platforms (like Shopify) have integrations that make setting up basic server-side tracking easier. For beginners, ensure your platform integration includes this if possible – it helps improve data accuracy. More advanced setups (like precise value tracking or custom triggers) often need a developer, but that’s usually for businesses spending €10k+ monthly. You don’t need that complexity starting out.

    Crucial Step: VERIFY Your Tracking BEFORE Launching

    Don’t just install the Pixel and hope for the best. You MUST check that it’s firing correctly on the key pages and for the key events.

    • Use the official Pixel Helper tools provided by each platform (e.g., Meta Pixel Helper or TikTok Pixel Helper – usually free browser extensions). Go through your own checkout process – view a product, add to cart, initiate checkout, go to the thank you page after a test purchase (if possible). The Pixel Helper should show the correct events firing on each step.

    Launching ads with broken tracking is like throwing darts in the dark. You’ll get no useful data, the algorithm won’t learn, and you’ll waste money. Check it first.

    Advanced Tracking (For Later)

    If you eventually scale significantly or run ads across many channels, you might explore third-party attribution tools like Triple Whale, RedTrack, or Hyros. These offer more granular tracking and different attribution models but come at a cost and often require developer setup. We will touch on this in the advanced sections.

    The Takeaway: Do the 1% Work Now

    Look, I’ll be honest – dealing with tracking setup isn’t the most exciting part of media buying. I personally dislike the technical troubleshooting side. But it’s absolutely fundamental.

    Think of it like this: You do this essential 1% setup work once (or maybe revisit it occasionally), and it enables the other 99% – the actual analysis, optimization, and profitable scaling based on reliable data. It has to be done.

    Take the time, use the resources provided by the platforms, and get your tracking implemented and verified. It’s the bedrock upon which successful campaigns are built.

    Next Up: Is Your Website Ready?

    Once your tracking is in place, we need to make sure the place you’re sending people to (your website or landing page) is actually set up to convert them. That’s what we’ll cover in Article 2.3.

  • 2.1: Setting Goals & Knowing Your Key Numbers

    2.1: Setting Goals & Knowing Your Key Numbers

    Okay, you’ve grasped the basics from Section 1 and might be ready to dive into ads. STOP.

    Before spending a single cent, we need to talk numbers – your business numbers. Skipping this isn’t just risky; it’s like flying blind. You need a target before you can aim, otherwise, you’re just burning cash hoping something sticks.

    Why Your Business Numbers Are Non-Negotiable First

    Look, let me be straight with you. Before I work with any client, before I even peek inside their ad account, we go right back to the basics. I simply cannot perform effective media buying if I don’t know the core numbers of your business.

    Think about it: How can I help you hit a target if you haven’t defined what the target is?

    I need to know things like:

    • What’s your target Cost Per Acquisition (CPA)? (How much can you realistically afford to pay to get one new customer?)

    • What’s your Average Order Value (AOV)? (How much does the average customer spend in one go?)

    • What are your Costs of Goods Sold (COGS)? (What does it actually cost you to produce/deliver what you sell?)

    • What’s your Profit Margin per sale?

    • What’s the Lifetime Value (LTV) of a customer? (Do they buy again? How much are they worth over time?)

    These aren’t just abstract business metrics; they are the foundation of successful media buying. Imagine media buying is like an enchantment spell for your business – it can amplify what’s already there, make it stronger, faster, more effective. But it can’t enchant something you don’t understand. If you don’t know the stats of the item you’re trying to enchant (your business numbers), the spell (your ad spend) is just wasted mana.

    Without knowing these numbers, you’re just guessing. You won’t know if your ads are actually making you money, breaking even, or slowly bleeding your bank account dry. You can’t tell if a $50 CPA is amazing or disastrous for your specific business.

    It’s Not Just About the Ads – It’s Your Business System

    Here’s a crucial point: Media buying success isn’t just about hitting a magic ROAS number. I’ve seen businesses thrive with what looks like a terrible ROAS (like 0.4!) because they have an amazing customer lifetime value (LTV) – people keep buying again and again, making that initial low return highly profitable over time. On the flip side, I’ve seen companies bleeding money even with a ‘good’ ROAS (like 5.3!) because their profit margins were razor-thin or their other costs were too high.

    The takeaway? Your ads are only as good as the business fundamentals they support. Knowing your complete financial picture is what tells you if a campaign is truly working. It’s your business numbers that make or break it, not just the ad metrics in isolation. My job, and what I want to teach you to do for yourself, is to first figure out if the numbers even make sense – can media buying realistically help you achieve your goals based on your current economics? Only then do we proceed to the ad platform.

    The Key Metrics We Need to Nail Down (Especially for E-commerce)

    Okay, so what are the absolute must-know numbers before you spend that first dollar on ads? Let’s break it down. We need to figure out:

    1. Your Profit Per Order: How much actual cash do you pocket from an average sale?

    2. Your Break-Even Point: What’s the absolute maximum you can spend to acquire a customer and not lose money? (Your break-even CPA and ROAS).

    3. Your Target CPA / ROAS: Based on your break-even, what result are you actually aiming for to make the ads worthwhile?

    (We’ll also briefly touch on why knowing costs for steps before the sale, like Cost per Landing Page View or Cost per Add to Cart, becomes important for diagnosing problems later, but let’s calculate the big targets first.)

    Let’s Use a Running Example:

    To make this super practical, let’s follow a simple example throughout these next sections. Imagine you run an online store selling trendy sneakers.

    • Business: Online sneaker store.

    • Situation: Been operating for ~2 years, getting 10-30 sales/month organically/referrals, wants to use ads to grow.

    • Selling Price: Let’s say your average sneaker sells for €100.

    Step 1: Calculate Your Average Profit Per Order

    Before you can set a target for your ads, you need to know how much money you actually make on an average sale. This isn’t just the selling price; it’s what’s left after your direct costs.

    A. Find Your Average Order Value (AOV):
    If you sell multiple products or people often buy more than one item, your average sale value might be higher (or lower) than €100. Look at your past sales data (from Shopify, WooCommerce, Stripe, your spreadsheet – wherever you track sales).

    • Simple AOV Formula: Total Revenue / Total Number of Orders (over a specific period, like the last 3-6 months).

    • For simplicity in our example, let’s assume customers usually buy one pair, so our AOV is €100But check your own data!

    B. Calculate Your Cost of Goods Sold (COGS):
    This is what it costs you to get the product ready to sell.

    • Where do the shoes come from? Are you making them? Probably not. Most likely, you’re buying them from a supplier or factory. Let’s say the cost to buy one pair of sneakers from your supplier is €30.

    • What else goes into COGS? Think about costs directly tied to each sale. This could include:

      • The product cost itself (€30)

      • Maybe basic shipping from the supplier to you (averaged per item).

      • Basic packaging materials directly used for that item.

    • Pitfalls: Don’t include your general marketing costs, website hosting fees, or your salary here – those are overheads, not direct COGS per item. We need the cost tied to the specific product being sold.

    • Complexity: COGS can get complicated. It might change if you order in bulk (scaling decreases cost per item) or switch suppliers. For now, calculate your current best estimate per item. Let’s stick with €30 COGS for our example.

    C. Don’t Forget Transaction Fees:
    Every time someone buys, payment processors (Stripe, PayPal, Shopify Payments) take a small cut. This eats directly into your profit. It’s usually a percentage plus a small fixed fee (e.g., ~2.9% + €0.30).

    • For a €100 sale, let’s estimate transaction fees at roughly €3Check your processor’s actual fees!

    D. Calculate Gross Profit Per Order:
    Now, put it together:

    • Average Order Value (AOV): €100

    • Cost of Goods Sold (COGS): – €30

    • Transaction Fees: – €3

    • Gross Profit Per Order: €100 – €30 – €3 = €67

    So, for every average €100 sale, this sneaker business pockets €67 before accounting for advertising costs or other general business overheads.

    THIS €67 IS YOUR STARTING POINT. It tells you the maximum theoretical amount you could spend to acquire one customer and still break even on that first sale.

    Step 2: Determine Your Break-Even Points (CPA & ROAS)

    Now that you know your Gross Profit Per Order (€67 for our sneaker store), you know the absolute maximum you can spend on advertising to acquire one customer without losing money on that specific sale.

    • Break-Even Cost Per Acquisition (CPA): This is simply your Gross Profit Per Order.

      • In our example: Break-Even CPA = €67

      • If you spend more than €67 on ads to get one €100 sale, you lose money on that transaction (ignoring LTV for now). If you spend less, you make a profit on that transaction.

    • Break-Even Return On Ad Spend (ROAS): This measures how much revenue you need to generate for every euro spent on ads just to cover your COGS and transaction fees (i.e., to hit your break-even CPA).

      • Formula: Average Order Value / Break-Even CPA

      • In our example: €100 AOV / €67 Break-Even CPA = 1.49 ROAS (approximately)

      • This means for every €1 you spend on ads, you need to generate at least €1.49 back in revenue just to break even on that sale.

    Why Breaking Even Isn’t the Real Goal

    Okay, knowing you can spend up to €67 to get a customer is useful, but aiming just to break even isn’t a sustainable business strategy. Why?

    1. Profit is King: You need actual profit to reinvest, grow, and pay yourself.

    2. Overheads: You have other business costs not included in COGS (website hosting, software subscriptions, maybe rent, your time!). Your ad profit needs to help cover these.

    3. Buffer: Things change. Costs might rise, competition might increase. Having a profit margin provides a safety net.

    Step 3: Set Your Target CPA & ROAS

    So, how much should you aim to spend? This is where you decide your desired profit margin from ads. There’s no single ‘right’ answer, but a common starting point is to aim for a CPA that’s significantly lower than your break-even.

    • Simple Method: Decide on a profit margin you want after ad costs. Maybe you want to keep at least €20 profit per sale after paying for the ad that brought the customer.

      • Target Profit = €20

      • Gross Profit = €67

      • Target CPA = Gross Profit – Target Profit

      • Target CPA = €67 – €20 = €47

    • Alternative Method: Aim for a CPA that’s a percentage of your Break-Even CPA. Maybe you decide you only want to spend up to 70% of your break-even point.

      • Target CPA = Break-Even CPA * 70%

      • Target CPA = €67 * 0.70 = €46.90 (Let’s round to €47)

    Let’s go with €47 as our initial Target CPA for the sneaker store.

    This means our Target ROAS is:

    • Average Order Value / Target CPA

    • €100 / €47 = 2.13 ROAS (approximately)

    This is your North Star: When you run ads, you’re aiming to get customers for around €47 each or achieve a ROAS of about 2.13 or higher. This ensures each sale driven by ads is actually profitable according to your goals.

    Working Backward: What About Clicks and Add to Carts? (Funnel Math)

    Now, how does this €47 Target CPA help us before we even get sales? We can use industry benchmarks or your own website data (if you have it) to estimate what your costs should look like at earlier stages of the funnel.

    Let’s assume a common website Conversion Rate (CR) of 2% for our sneaker store. This means that out of every 100 people who land on your product page from an ad, you expect 2 of them to eventually buy. (Your actual CR might be different, but 2% is a reasonable starting point for planning).

    If 2 out of 100 visitors buy, and our target is to pay €47 per buyer (Target CPA), we can estimate our target costs for getting those initial visitors:

    • Target Cost Per Landing Page View (CPLPV): If 100 views lead to 2 sales, and each sale should cost €47 max, then those 100 views combined should cost no more than 2 * €47 = €94.

      • Target CPLPV = Total Target Cost / Number of Visitors

      • Target CPLPV = €94 / 100 = €0.94

      • So, you’re aiming for clicks/landing page views that cost less than €0.94 each.

    We can estimate further down the funnel too. Let’s make some rough assumptions about drop-off (these are just examples, your numbers will vary!):

    • Assume 10% of Landing Page Visitors Add to Cart (ATC). (So, 10 out of 100 visitors).

    • Assume 30% of those who Add to Cart Initiate Checkout (IC). (So, 3 out of the 10 ATCs).

    • Assume 67% of those who Initiate Checkout Purchase. (So, 2 out of the 3 ICs – hitting our 2% overall CR).

    Now, let’s work out the target costs per step based on our €47 Target CPA and these assumed funnel rates:

    • Target Cost Per Add to Cart (ATC Cost): If 10% of visitors ATC, and we need 100 visitors (costing €94 total) to get 2 sales, then those 10 ATCs cost €94 total.

      • Target ATC Cost = €94 / 10 = €9.40

    • Target Cost Per Initiate Checkout (IC Cost): If 30% of ATCs IC, and we need 10 ATCs (costing €94 total) to get 2 sales, then those 3 ICs cost €94 total.

      • Target IC Cost = €94 / 3 = €31.33

    Why Bother With These Intermediate Costs?

    Your main goal is the Target CPA (€47). But these estimated targets (€0.94 per view, €9.40 per ATC, €31.33 per IC) are your diagnostic toolkit.

    When you start running ads:

    • Is your Cost Per Landing Page View way higher than €0.94? Maybe your ads aren’t relevant enough, or your bids are too high.

    • Are you getting cheap views, but your Cost Per Add to Cart is like €25 instead of €9.40? That screams: “Problem on the product page!” (Bad description? Unclear price? Slow loading?).

    • Are ATCs cheap, but Initiate Checkouts cost €60? Problem in the cart or early checkout stages! (Shipping shock? Confusing layout?).

    Knowing these rough targets before you start lets you immediately identify where in your funnel things might be breaking down, so you know what to fix instead of just guessing.

    So, What’s the Bottom Line? Know Your Targets.

    Alright, we’ve walked through the essential math. Whether you used our sneaker example or plugged in your own numbers, the process is the same: figure out your profit per sale, determine your break-even points, and most importantly, set clear, profitable Target CPA and Target ROAS goals for your advertising.

    Doing this homework before you spend is non-negotiable. It shifts your mindset from gambling to investing. It gives you the clarity to know what success looks like for your business, and it provides the context to understand the results when they start coming in. You now have the financial targets you need to aim for.

    But How Do You Know if You’re Hitting Those Targets?

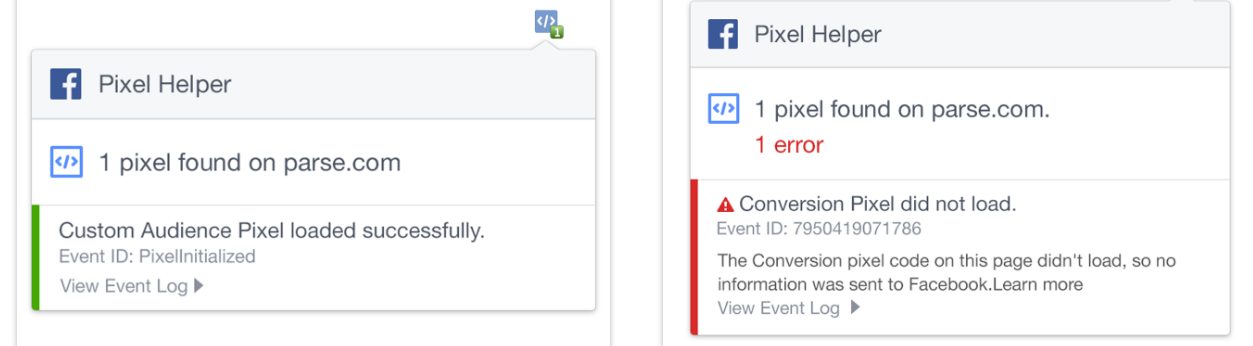
    Knowing your goals is step one. Step two is making sure you can actually measure your performance against them. How does Facebook (or any ad platform) know if someone who clicked your ad actually ended up buying on your website? How can you track that €47 Target CPA we calculated?

    That requires setting up tracking correctly. It might seem technical, but it’s the crucial link between your ad spend and your business results. Without it, you’re flying blind, even with the best-laid plans.

    In the next article (2.2), we’ll tackle exactly that: Tracking Setup: The Boring Bit That Saves Money. Let’s make sure you can actually see what’s working.